If your familiar with Danish oil finish then scroll down to get to the tips. Otherwise, keep reading for some basic information. Looking for a list of all supplies discussed? Click here to jump to the list of the Danish Oil mixing supplies.
Danish Oil Finish… Whats that?
A little background for those less familiar with Danish oil finish. Danish oil is a wood finish characterized as a wiping finish. Meaning that the wood is saturated, let soak for a short period of time then wipe off.

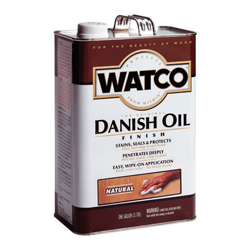 Tung Oil Finish, Danish Oil, Boiled Linseed Oil are all wiping finishes. They all are applied in the same manner. Natural Oils such as Walnut oil, Olive Oil, Mineral Oil, etc. fall into this category too. Keep in mind that Tung Oil Finish is different from raw Tung Oil. Natural oils, additionally come in this raw state vs finish state. Think cooking oils (i.e. grapeseed, walnut, olive, etc.) as the raw state.
Tung Oil and Linseed Oil in their raw natural form also belong to this group. Most of these raw or natural oils are not heat treated. Nor do they have drying agents so they cure very slowly, if at all (exceptions to pure Tung oil). They are typically labelled as pure or raw.
Composition varies between manufacturer but Danish oil finish is often made of varying concentrations of an oil (i.e. Tung or linseed oil) a varnish, some combination of solvent, and dryers. Danish oil is considered a hard-drying oil thus it polymerizes to into solid form. Generally speaking I am referring to the natural Danish Oil, as there are formulations that add various tints and tones.
Think of polymerization as curing, or the extent that the finish turns from a liquid to a solid. So, the Danish oil finish dries out and forms a hard surface. Some products labelled as Butcher Block oil or cutting board oil are generally composed of Mineral oil. While food safe (that is mineral oil) its a petroleum product and tends to evaporate rather than polymerize. Butcher block/cutting board conditioners usually have some wax added in (beeswax, carnuba wax, etc.) so there will be some polymerization of the waxes.
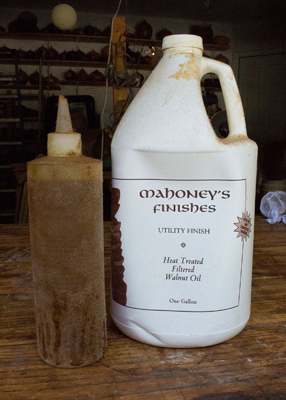 Heating an oil or adding dryers speed up the polymerization rate, or cure rate. Dryers are heavy metal salts usually cobalt or manganese in origin. (Notice the “heat treated” on the Walnut Oil Finish)
Danish oil finish is popular for its ease of use, availability, and its hard-drying nature. I used Watco Danish Oil for many years before mixing my own. On larger projects, i.e. furniture, built ins, trim, etc. I sometime still us Watco Danish Oil. I would probably use my own formulation though for higher wear areas.
How to Apply Danish Oil…
It’s a wipe on finish so wipe it on with a cotton rag, foam brush, brush etc. and let soak. I cut up small pieces of cloth for most applications. The brushes are better for larger flat surfaces. Let the finish saturate for a short time and wipe off the excess. I apply commercial and self made batches in the same way.
How man coats of Danish oil should be applied?
The packaging usually suggests a couple, i.e. two or three. However, I think the answer is determined by the product used and the degree of sheen that is sought.
A flatter sheen requires fewer coats than one with a bit more glow. Thinner oils also require more coats than thicker finishes, e.g. wipe-on-poly. I typically have five to eight coats on all of my pieces. The actual number varies depending on the thickness of the finish when applied.
Time to Mix Your Own Finish… Check Out This Video
 For those with more experience, why mix up your own Danish oil finish? For many years I used Watco Danish oil and I really liked it, I used it a lot. So why bother mixing up my own finish when I can buy a can of the stuff already made.
My thinking shifted when I heard that commercial Danish oils contained a very high ratio of solvent. Around that time, I started learning about the finish that Sam Maloof was well known to have used. I didn’t like the idea of paying money for solvent. Since Sam Maloof had been making furniture for much longer than I have, maybe he knew something I didn’t.
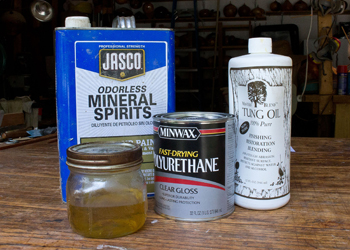 Come to find out, there are several variations of Maloof’s finish recipe. The general format that I settled on was a 1:1:1 ratio of solvent, Tung oil finish, and gloss poly. Since all this stuff is oil base the solvent is mineral spirits.
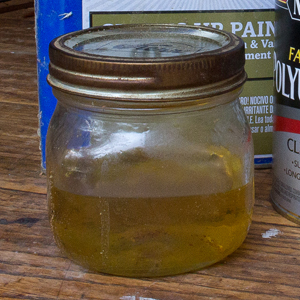
I use Minwax gloss polyurethane and mineral spirits that I purchase from Amazon/Hardware store. The Tung oil finish (Perserve) is purchased from Klingspor. As of October 2021 Perserve Tung oil appears to have been discontinued. The next batch I make I will be trying Real Milk Paint Pure Tung Oil. It’s really easy to do, just mix all three in equal parts and off you go. I usually keep it mixed up in a wide mouth elite pint mason jar. Occasionally I replace the lids and rings when they get really gummed up.
Note that I use gloss poly vs semi or satin poly. The later have flattening agents in them so the sheen is more limited in those products. I have more options over the end sheen using gloss poly as sheen can be flattened out with fewer coats or rubbing out.
As a professional wood turner, I have used this recipe extensively over the last 12 years. I have put Danish oil on pine, poplar, walnut, maple, etc. It’s used as a seal coat for the majority of the sculpture and urns I produce. I also use it as a top finish coat for anything that I want a satin sheen on. That’s furniture and turnings for me.
Here are the three main things I like about mixing my own Danish Oil finish
1 – Higher Solids Content: Mentioned above, commercial finishes purportedly have higher ratios of solvent. While I do not know the actual solvent amount, the thinness of commercial Danish oil finish suggests an amount greater than this recipe.
By comparison, this means their solids content is lower, as this formula has less solvent. The solids in a finish is what is left on the wood surface after the solvent has evaporated.
The higher solids content comes from the polyurethane and the Tung oil in this mixture. So, more solvent means fewer solids and less overall finish thickness per coat.
I prefer this mixture as there is better build per coat and it still functions like a wiping oil. This is really the main advantage as I build my finishes. The added build creates a finish that is more even, consistent, and has better glow.
2 – Controlling Waste: I mix up small batches, which are smaller than an amount that I would have to buy. This limits the number of openings on the finishes purchased.
 All finishes have a shelf life, which is decreased with more exposure to air. So, the longer the can is open (i.e. the gloss poly and Tung oil finish) the quicker it will skim.
Additionally, this homemade finish is subject to skimming over much more quickly than commercial Danish oil. Skimming is when the surface layer of the finish turns to solid.
Thus, the need for smaller quantities as it has a shorter shelf life. This way the majority of the air exposure is put on the mixed finish rather than the components that make up that finish. Though I have never used it, some people advocate the use of Bloxygen to mitigate this problem. Bloxygen displaces the air in the container that hastens finish curing. I think its use is better served in the containers that aren’t used as often, i.e. the components that make up the finish. I am usually finishing frequently so I would be using a fair amount of Bloxygen.
3 – Cost: I hadn’t considered the cost until recently, and surprisingly the cost may end up being cheaper. A gallon of Watco Danish Oil is $44.99 excluding tax which works out to $0.35/oz. or $1.05 for three ounces.
I use Perserve Tung Oil Finish bought at Klingspor, Minwax Gloss Poly, and Spirits from Lowe’s each break down to $0.72/oz, $0.37/oz, and $0.11/oz respectively in the quantities that I buy. All told a 1:1:1 ratio gives three ounces of finish at a price of $1.20.
On a per coat basis the commercially produced Danish oil finish is slightly cheaper. The build is not as good and I am confident it takes more coats to develop equivalent finish thickness.
To finish a hollow form of mine, let’s say each coat takes 1 oz of my homemade finish. Its common for me to put 7 coats of finish on them, sometimes fewer. At $0.40 per coat that would be $2.80 for those seven coats.
To develop similar build with a commercial Danish oil it would at least 10 coats. That would cost me $3.50 in finish cost. Those additional coats make it more expensive from a material, time, and labor basis.
But wait… there is a Drawback
I hinted on this above and it’s not much of a negative, just something to be aware of. Higher percentages of solvent in commercial products extends shelf life once the container is opened. Mixed up Danish oil evaporates more quickly. This means in the summer and in climates that are drier there is less time available to do the wiping off before the finish begins to become tacky.
Generally, this is not a problem when the Danish oil finish is freshly mixed up. Possible exceptions for larger projects. However, the older the finish is the greater the degree of evaporation and the more concentrated the other components of the finish become.  For me this is not much of a problem since the items that I am finishing are comparatively small. I batch my finishing so as I am using older finish I just wipe off more frequently.
On larger projects I would suggest using a fresher mix or adding a bit more solvent to a finish that is more concentrated. I typically do this if my old finish has started to skim a bit and I am towards the bottom of my container.
When a finish has become tacky, the wiping off is very difficult and the wet finish picks up more fibers from the wiping cloth. If this happens, just stop wiping off and let the finish set.
Once the finish dries it is glossy, the finish layer is thick, and it requires sanding down. The sanding evens out the irregularities in the finish layer and removes surface particles as well as wiping cloth fibers.
I build finishes so the sanding is not a problem. Use 400 grit sandpaper and sand the outer coat then continue finishing with freshly mixed finish.
Here’s an Added Tip… Cleanup of dried Danish Oil Finish
I mix up this finish in wide mouth half pint mason jars. Its common for the finish to skim before its used up. Most of the time I remove the skim layer and add a small amount of solvent to get to the bottom of the jar. This does leave a small ring of set finish on the inside of the jar. Other times, the finish has set so much I just dump it all and mix a new batch.
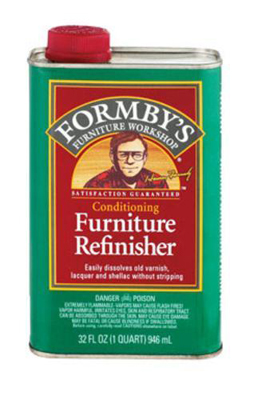 Either way, its necessary to clean the jar before mixing anew. To do that I use Formby’s Furniture Refinisher, a small amount, to help clean up any old set finish. Recently I have used Minwax Furniture Refinisher, getting similar results. Minwax bought Formby’s so I suspect its the same stuff.
Swirl a small amount around the inside (with the top on) of the jar to coat all the inside surface. Give it some time to soak and then rub the inside of the jar with 00 steel wool to clean up stuck bits.
Wash the residue out with a small amount of mineral spirits, and wipe down with a paper towel. Wash again with hot soap and water to further clean any residue. Dry completely and mix up a new batch.
A List of all Items Covered in this Danish Oil Finish Article
Watco Danish Oil
Tung Oil Finish
Boiled Linseed Oil
Walnut Oil Finish
Butcher Block Oil
Box of wiping rags
Brushing sponges
Mineral Spirits
Gloss Polyurethane
Bloxygen
Widemouth Elite Pint Mason jar
Mason jar lids – Widemouth
Widemout Mason jar rings
400 grit sand paper
00 Steel Wool
Formby’s Furniture Refinisher
Minwax Furniture Refinisher
Real Milk Paint Pure Tung Oil
