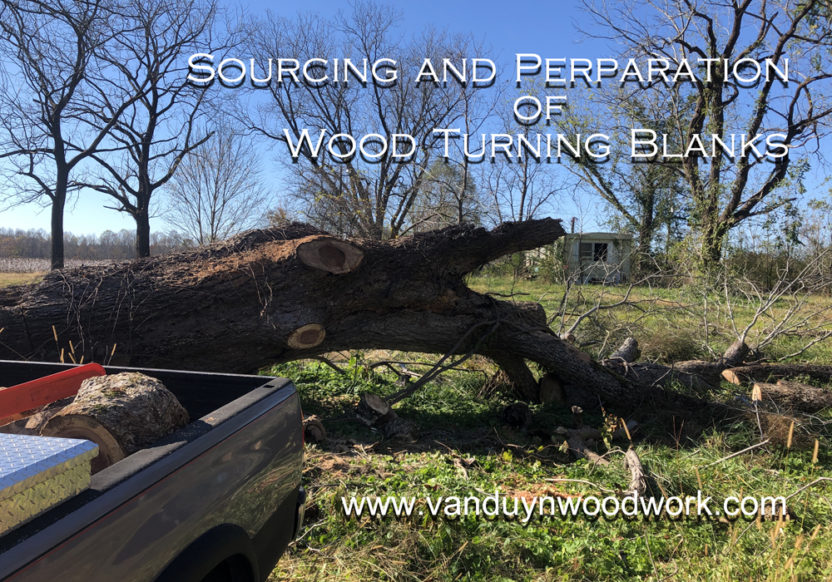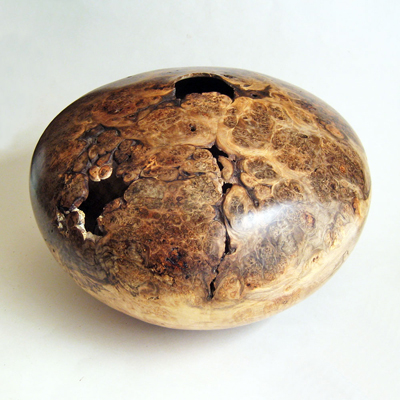
This article covers the selection, gathering, and processing of wood turning blanks and turning stock. I am a professional wood sculptor primarily in the creation of asymmetrical, irregular, and off-balance natural edge wood sculpture. I also make cremation urns and some functional wood bowls. The bulk of my experience is in bowl and hollow turning. I will also talk about where I find wood for turning on a lathe. At the end of the article there is a list of tools that I use for wood gathering. Click here to jump to the list of wood gathering tools.
Orientation of the Wood Blanks
Woodturning is basically composed of face grain and end grain work. Spindle turning is in most cases end grain turning. Meaning the wood is mounted on the endgrain between the headstock and tailstock. Thus the wood grain is running parallel to the bed of the lathe. Bowl and vessel work primarily is face grain turning stock, with some end grain work. Face grain turning has the wood turning blank mounted so that the wood grain runs perpendicular to the lathe bed. Sourcing material for end grain turning is a bit easier as a lot of end grain turning does not require material that is very thick. At least relative to face grain turning.
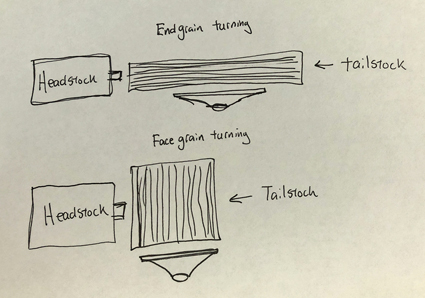 Consider spindle work for furniture often does not exceed 8/4 – 12/4 material. Bowl turning, for example, needs thicker wood to produce items that are more proportionate. If I was to make a 4” H x 12” Dia bowl from end grain material, it would require a cross section greater than 12” on either side of the pith of the tree. While that is doable in some cases, it would need a tree that is around 30” across or larger.
Sourcing wood in this manner is only doable if you were to cut the material for yourself. Outside of a few isolated companies that sell wood turning blanks, there are limited suppliers of wood turning stock. Sourcing spindle blanks is fairly easy, but if you want to make anything large you need to learn to find and cut the wood yourself.
What species of trees are good for wood turning blanks
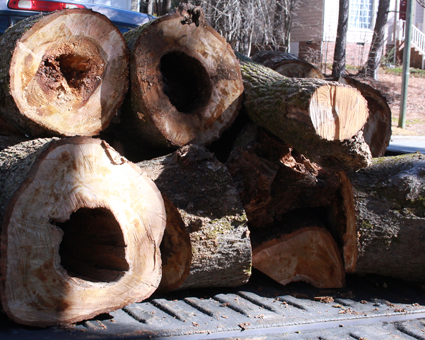 The beauty of wood turning is that you can use nearly any species of tree from any part of the tree. Some sections are better than others in that they are more stable or easier to turn, but any tree is an option. Stable meaning that the wood is less likely to warp or move during drying or machining. This makes for good lathe turning wood.
Generally, hardwood trees are preferred, so it will depend on where you live and what species of tree grow around you. I am in North Carolina, and there is a vast abundance of hardwood trees in my region. Oak, Maple, and Sweet Gum are the most common, but there are well over thirty species of trees that good candidates. Sometimes there are uncommon species of trees that don’t grow that large but can get large enough to make something out of.
Learn what the species of trees are in your area, and what their growth characteristics/properties are. I.e. what is the density of the tree and what type of grain does it have (coarse, medium, or fine). How the wood moves during drying, its rot and insect resistance are also good things to keep in mind too.

Threaded Persimmon Finial
With a little research you will be able to start identifying which trees are good species for certain wood turning tasks. For example, I source dogwood and persimmon as domestic species that cut a thread well. These two species were often used in making golf drivers. They are hard and have medium to fine grain, so I theorized they may be good for thread chasing. While the threads aren’t as crisp as African blackwood, it is a decent domestic option. Boxwood is very good for this too, however finding a boxwood large enough to cut blanks is difficult.
Where do I find wood for wood turning blanks?
This is the most common question that I get, where do I find wood for turning on a lathe? I source wood primarily form central and eastern North Carolina. If you live in an urban area, as I do, you have to be flexible. First off, I would say that unless you have experience in doing so I would not drop a tree yourself. I recommend, mostly for liability reasons, that you cut trees that have already been felled for one reason or another. That is the were dropped by someone else or mother nature.
Trees in the City
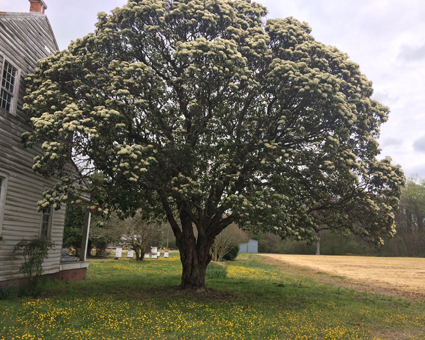
Old Homestead – Photinia Serrulata
One of my favorite places to source wood is from old homesteads or historic districts in a town or city. It’s a bit trickier to do this but there are often some real nuggets there. Its not uncommon to find odd ornamental species of trees that were planted quite long ago. Thus, they have grown large enough to develop good size for wood turning. Older wood often has nicer figure and color.

Large Poplar Burl Blanks
In the city, try and source trees from arborists and tree removal services. I saw this poplar burl sitting on the road curb waiting to be hauled off. I got it from a local arborist. Its a bit weathered looking now but I recently turned some and its pretty amazing stuff.
Municipal wood dumps can be another source if you are able to get access. Generally I find though, that in the city people are more concerned about liability and its more difficult to get access. I have tried to talk to developers that are clearing land, but have found that to be the most difficult and generally not worthy my time. Harvesting Urban Timber is a good book as a reference.
Probably the easiest way is if you ask a property owner if you can have the wood from their tree if they are taking it down, or if it has fallen in a storm. Provided it’s not a dangerous situation or has risk of causing property damage. I find most property owners are pretty agreeable. A lot of time they are happy someone will take care of cleaning up the tree for them. Be wary though it’s common for people to put various metal things in the trees that aren’t obvious.
Once upon a time I had a large walnut tree sawn up into boards. The mill hit something in the tree and it broke off every tooth in the bandsaw blade. After further inspection it ended up being a sparkplug. If you cut into a tree and you see blacks, grays, and purples that seem inconsistent with the rest of the tree color it is likely iron staining. There is going to be metal somewhere so be wary. Lastly, there is a lot of wood in a tree and its easy to get overwhelmed. So be careful as to how much work you are committing yourself too. This is a good faith arrangement the majority of the time and your word is important.
Lathe Turning Wood from the country
I source a decent amount of my wood turning blanks from the country or rural areas. Most of these situations you will be asking for permission to cut a tree on someone else’s property. So be very mindful to leave their property in better shape than you found it.
Look up tax or property records of the landowner to try and find out how to contact the property owner for access. You do this by searching on google for the county GIS data or maps. You may be able to get access to the land especially if you offer to make something for the owner. They may want you to sign a waiver of liability as you would be on their property doing the cutting. Technically they are liable for any injury you sustain on their property and some people are wary of this. In this day and age of litigation don’t be surprised if they want you to sign documents.
Most of the time I don’t encounter this, be mindful and responsible for your own safety. Don’t take advantage of the property owners generosity. I find, people are more generous and willing to help in the country than the city. Therefor, I usually have more trouble in urban areas getting access to wood.
Log sites
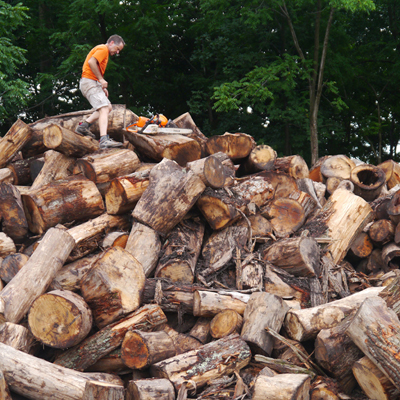
Twisted Roots Scavenges Cut off Piles
Tracks of hardwoods that have been logged are good places to find wood turning wood. Loggers are looking for the largest and straightest wood so they always discard irregular, “defective”, or flared parts of trees. These are left in large bone piles usually near the access point of the property. Crotches, burls, and bases of the tree that flare out almost always have figure in them, and they are usually in these reject piles. Twisted Roots scavenges cut off piles like this. My experience has been similar, although in my area they don’t usually produce as large of a pile as this.
Field Edges
This is one of my favorite places to find larger trees, really good for bowl blanks. Farmers don’t want trees shading the edges of their fields so they are more incentivized to have trees taken out that are in this condition. They may even be in the process of doing that themselves.
Trees on the edges of the fields benefit from propagation of seeds by birds, thus there is usually a greater variety of species on these field edges and fence rows. Additionally, these trees benefit from fertilizer run off and as such grow much larger more quickly. There can be some really good sized trunks on field edges. Several years ago, I cut a section of black cherry trunk that uprooted in a hurricane that was on a field edge. I had it sawn up into boards and was able to get some 22” wide boards out of it.
Storm Damage
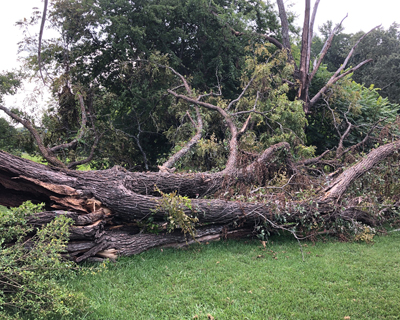
Walnut Tree Felled in a Storm
Trees on field edges and fence rows have a propensity for blowing over and laying on the edges of the fields. Thus, there may be trees laying down that are overgrown by brush and are still usable. Areas that are hit by hurricane, tornadoes, and strong storms are excellent candidates for gathering wood. Keep your eyes open for these areas if they aren’t too far from you. It does go without saying, there is likely damaged spots in the trees that yield unusable wood. Ring shake and wind shear damage are common in storm damaged trees. Again though, there is a lot of wood in these situations, so its usually best not to get over your head in wood gathering.
What Tools do I need for Wood Blank Gathering?
The primary piece of equipment is a vehicle to transport the wood. For the most part this is going to be a truck of some form. Though that will depend on how many wood turning blanks you are looking to gather. A trailer is not a bad idea if there is a lot of wood to be gathered. The size of the wood turning blank and what you can lift yourself is going to influence that most heavily.
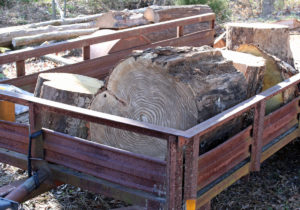
Trailer of Wood in Large Sections
My preference is to leave blanks in as large of a form that is easily transportable. So, there is a balance between this and the wood being so large that it is difficult to move. I have gotten myself over my head many times before, so now I like to only fill up the bed of my truck on any given trip. I will use a trailer if there is a need to move the wood quickly or if the wood is something special.
A list of the main wood blank gathering tools I use
Truck/trailer
Chainsaw – Husqvarna Rancher 445, Husqvarna Rancher 455
Box of Chainsaw supplies – files, extra Rancher 445 chains, extra Rancher 455 chains, scrench, two cycle oil
Gas can for chainsaw – oil/gas mix for saw
Gas can – straight gas
Bar oil
Wrecking bar
Wedges – steel wedges, wood, and plastic wedges
Hammer for wedges – 4lb hammer is good
Handtruck
Hearing protection – Earplugs/Ear Muffs
The chainsaw is the workhorse and I suggest at a minimum an 18” bar. A gas powered chainsaw is going to make your life easier. That’s basically going to be a Stihl or a Husqvarna. If you get into cutting larger trees a saw with a longer bar is a nice luxury but the price really goes up as the bar length gets longer. Additionally, larger saws put more wear on the body and really chew through gas. For most things I find myself using my smaller 445 more often.
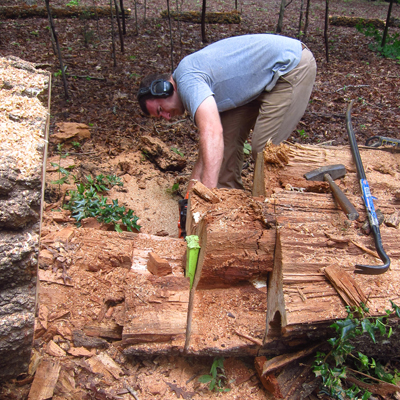
Using a Wedge to Unbind the Kerf
Most of the other equipment is fairly self explanatory. The extra chains and sharpening kit is to help keep your chains sharp. Sand and dirt are havok on a chain, and it doesn’t take but a time or two hitting the ground to dull a chain. Not to mention any unexpected material you find in a tree… ahem nails. You’d be surprised what people put in trees, I have a piece of Walnut that completely grew around a spark plug. The flat file is used to file the rakers on the chain, which causes each tooth to take a larger bite. I haven’t tried sourcing chains with larger tooth spacing yet, i.e. skip tooth chains. Slicing blanks the length of the tree produces large ribbons of shavings, both size and amount. Aggressive cutting frequently leaves those ribbons in the saw kerf. A skip tooth chain allows more room for shavings to evacuate, so it could be beneficial for those cuts. Though I would expect more shavings pile up under your saw. If that pile isn’t moved frequently those shavings start to clog up the area around your saw sprocket, jamming the chain. This is more of an issue if logs are cut on the ground and cut is in the bottom third of the cut, i.e. the saw is close to the ground.
The concept (for the skip tooth chain) is similar to resaw blades on a bandsaw that have larger tooth spacing. They evacuate material more quickly and thus material doesn’t bind up in the saw kerf. A much more enjoyable sawing experience as the blade doesn’t bind. Larger tooth spacing does put more strain on the motor though so if I look into it in the future I would get one for my larger saw.
All of my chains, sharpening equipment, some wedges, and 2 cycle oil in a small tool box I keep in the small toolbox. Its handy to have some work gloves and some rags in the box too (its easy to overfill bar oil). That tool box lives in my truck’s toolbox at all times with at least one of my chainsaws. Additionally, I tend to keep two gas cans on my truck – a larger 5 gallon tank that holds straight gas and a smaller one gallon tank for my oil/gas mix.
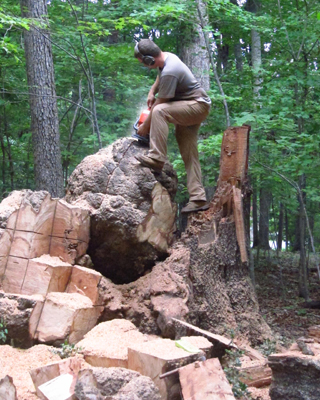
Sectioning a Large Oak Burl
The wrecking bar and wedges are mainly to section out larger trees. Sometimes you find really nice trees that are huge and can only be cut out in sections with 18″ and 20″ bars. These tools provide extra leverage to separate cut sections apart. Wedges are particularly useful in keeping the saw kerf from binding. The 4lb hammer I find a useful weight to hammer in wedges, though a sledge hammer could easily be used if you have that instead. Hand trucks are obviously for moving blanks. I have a large steel truck, lots of leverage. Though I find it takes up alot of room in the bed of my truck and its heavy to lug around. Unless I am moving blanks onto a trailer I only cut blanks to sizes that I can lift into my truck. Even with a trailer I don’t want really big sections as they are still hard to manage. So I don’t find trucks rated with high weight capacities that useful. Some of the heavy duty aluminum hand trucks look very appealing but they are much more expensive. Its common to find them close to $200.
Wood Turning Blanks from Different parts of a Tree
I can speak mainly to bowls, hollow forms, and quartersawn material in this section. Bowl turning requires the most attention as to what part of a tree that a wooden bowl blanks comes from. As stated before you can turn from really anywhere in the tree. Location is primarily going to determine the degree of wood movement and rate of cracking.
Wood Bowl Blanks
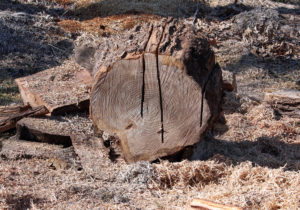
Sassafras Trunk Section
You want to cut wood bowl blanks from the trunk of the tree as the wood is the most stable. Upper limbs are going to increase the amount of wood movement. Additionally, cracking particularly in the rim of the bowl is going to be more of an issue.
You want to target tree trunks that are sufficiently large enough to cut on either side of the pith. The pith is the originator of cracking in the wood. So, as a general rule its best to remove the pith, especially for any wood turning project that is functional in nature. This will greatly improve the life of the piece you make.
Crotches are generally not good sections to make utility pieces from. The wood in a crotch can be, and often is, very unstable so expect some distortion at a minimum. Bowl turning requires turning a piece of wood twice so you want to reduce the amount of wood that goes into the firewood pile. This is done by making good selection before turning, and getting as little movement in the rough bowl turning.
Hollow Form Vessels
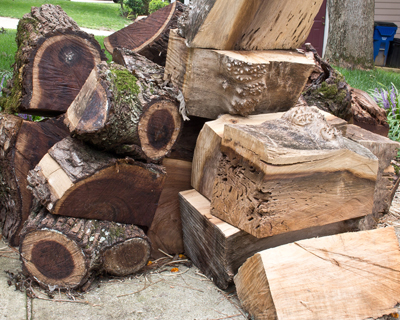
Walnut and Poplar Vessel Blanks
Cutting wood turning blanks for vessels is, to me, the most enjoyable. For the most part hollow forms are a decorative piece so there is a tremendous amount of flexibility in the wood selection process. I cut blanks from all parts of the tree that have sufficient size. Thus I turn alot of wood that would be considered “defective”
In particular, as I gather all my wood, I target crotches as I know that there will be at least some figure in the blank. There are crotches on every tree and they are almost always left behind. Burls are fantastic when found and maximize as much as you can get from them.
In regards to burls, I cut any and all that I find. I haven’t dug out any root burls as I don’t come across them often, and there is a lot of labor involved in doing so. If you have the equipment to do so go for it, but please don’t cut living trees just for the root burl. I recently dug out some root wood to see what that looks like. If you get into that, know that digging the root ball out is very labor intensive. Also I found that splitting the root ball up with some wedges helped a lot in the removal process. Additionally, the root ball needs to be cleaned thoroughly to removed rocks and sand. Otherwise you will wreck your chainsaw’s chain in a heartbeat.
Quartersawn Material
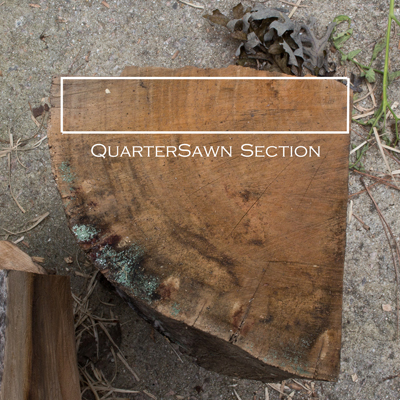 Particularly for utility wood blanks I like to cut a slab of material out of trunk sections that contain the pith. See the Sassafras section above. This is different than cutting straight down the pith line with one cut as I typically do for decorative blanks. Cutting a thick slab out yields quartersawn material on either side of the pith, usually from 2-6” thick. This is good and stable material, that I like to save for spindle turning.
This is also the best material to make platters from, as it is least prone to warping. Once upon a time I made some flat sawn crotch platters that my wife dubbed “unflatter platters”. Needless to say, while there was nice grain, they weren’t usable. The challenge with this though is finding a tree large enough that will give decent diameter material on either side of the pith. You need a pretty large tree to make quartersawn platters from.
Cutting Wood Turning Blanks
Lets start with the trunk of the tree. I buck the trunk up into bar length sections, so for me that’s around 18” sections. Usually there is some degree of crack on the pith. Examine the pith on both sides of the bucked section to and roll the section so that the crack is oriented top to bottom. Generally the pith is fairly close to the center area of the tree, though occasionally its not. When it is offset there is a balance between maximizing the area to either side of the pith and lining up the internal cracks. Sometimes there is no good choice. If I am cutting for hollow vessels I will make one cut right down the pith line (a cut down the length of the tree).
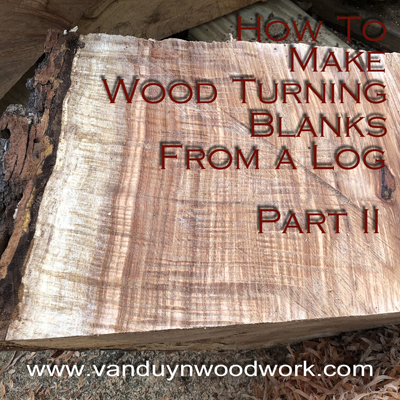 For most sized trees this will leave me with two halves that I can use to section later if I want. As I mentioned earlier, I like to leave these cut sections as large as possible so that any end checking can be cut out later. I prefer vessel blanks that are fairly close to cube shaped. So, if the shape of these halves aren’t too flattish I may leave it as is. Otherwise I would cut the halves again and leave sections for small hollows. Most likely they will be natural edge vessels. Refer to my video on cutting wood turning blanks. I look through some pecan and decide what I want to cut out of it.
Wood Turning Blanks for Bowls
Working from the trunk of the tree, the bucked section is rotated so the main crack along the pith is running top to bottom. I prefer to cut a thick section containing the pith out of the tree, though some prefer to make a single cut along the pith line. Those that do usually get to roughing bowl blanks more quickly than I do. At this point I establish how thick that section is going to be.
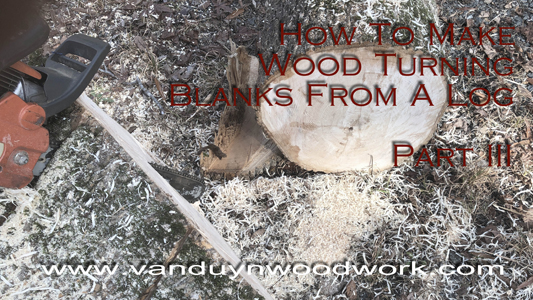 There are two ways to go for cutting bowl blanks. That all depends on whether you are making natural edge bowls or not. Deciding this will influence whether the pith section is going to be flat or irregular shaped. For natural edge blanks use the outside of the tree as your guide and make a parallel cut to establish the depth of the blank. Otherwise make your cuts on either side of the pith first, then make parallel cuts towards the outside of the tree to establish the bottom of the blank.
The pith can drift quite a bit from one side of the bucked section to the other. When that occurs, it is often best to make natural edge bowls as there is less material lost due to the pith section. I talk more about cutting blanks for bowls in my third video on blank cutting.
Cutting Crotches for figured wood
I like to turn crotches as they almost always have some figure in them. These are going to almost always be sculptural pieces. Times where they are sealed vessels I don’t expect the presence of the pith to cause too much distortion. I am occasionally wrong though so there is some risk.
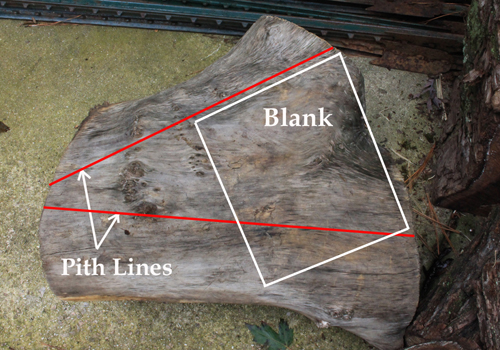 Think about how the pith travels in a crotch. On one side of the crotch there is one pith and on the other there is usually two. Sometimes there are more however, depending on how many branches came out of the joint. If you were to draw a line connecting the piths you would end up with a “V”. The figure is primarily in between the “V” section and that is where I want to center my blank. I roughly make a cube out of that. If the crotch is large enough I am able to cut most of the pith out.
As there are crotch sections of all sizes, I don’t mind the pith remaining in the blank on smaller crotch sections. Sometimes there is nice contrast from the sapwood to hardwood in those sections and its worth working around. Generally decisions about what is kept and what is cut out is done on the lathe.
Cutting for Wooden Spindle Blanks
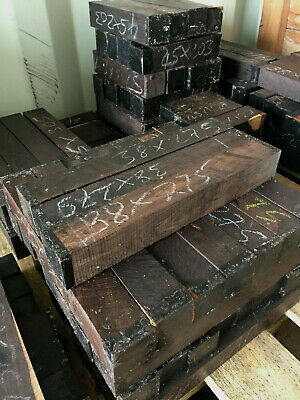
African Blackwood Spindle Blanks
Spindle blanks are roughly square cross sections that run various lengths. They come in all different sizes from pen turning blanks to large blanks for bed posts. For my projects I generally use 2x2x18 blanks of blackwood and persimmon for finials.
If I am planning to cut long spindle blank sections, as if for bedposts, I buck the trunk of a tree at that length. This is where longer bars on a chainsaw really pays off. When cutting along the length of a tree the shavings are long and ribbon like. Its easier to make these cuts when the bar is longer than the cut. The shavings are removed from the end of the bar as well as the back of the saw.
If the bar is not long enough then the shavings only escape from the back of the saw and the saw is more prone to clogging up. This is more commonplace with making long cuts with shorter bars. Either way, the trunk is bucked up at the planned length and then the pith removed.
Wood for spindle wood in most cases needs to be dry so the pith can’t be there. This also means that quartersawn and riftsawn sections are the most desirable as they are the most stable during drying. It also means that if your cutting bedposts like I have then you are going to be waiting several years for them to air dry. 5” bedposts need 5 years to dry. 1 year of air drying per inch of thickness is the general rule.
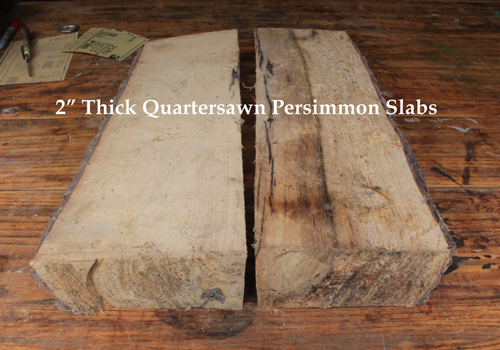 The times that I have cut for spindle blanks, the pith sections are removed and the two halves cut into quarters. Those quarters are sectioned at the desired thickness with a chainsaw. The aim in quartersawing is to have the end grain in a board running top to bottom.
This is mainly done by making a slice off a tree quarter then rotating the remaining section 90 degrees and making another slice. The process is repeated until there is no usable size left. I have several persimmon quartersawn slabs that I used for thread chasing. I take those slabs and then cut them into square cross sections on a bandsaw, though a chainsaw can also be used.
Grading Defective Wood
Defective wood is really all about view point. Conventional though is that wood needs to clear and completely intact. For me anything goes, I turn wood in all forms. In my view, the condition of the wood determines what its use is. If wood that I gathered needed to be defect free for everything, I would be throwing away a lot of wood. This is part of the reason that I make a variety of objects. The condition of some wood is better for sculpture and others better for utility.
Bowl Turning
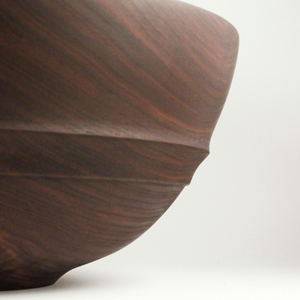 Wood for bowl turning or any other utility piece undergoes the most stringent selection. Wood for utility work needs to be crack and defect free. Another reason why this wood comes from the trunk of the tree. Any defect can impact the longevity and function of a utility piece. Worm holes in the bottom of your bowl, while perhaps interesting, impacts it usefulness. Even with the best efforts in selecting wood, I most commonly loose rough bowl blanks to cracking in the rim. Sometimes that is due to my rough thickness not being that uniform. Other times the cracks will show up in the rim, knot holes, or other defect areas.
Sculptural Turnings
Turning for decorative objects offers the greatest freedom. Early on I found in bowl turning that I couldn’t use certain blanks because they had various defects. Those defects include, spalted wood, insect holes, crotches, cracks, knots, voids, bark inclusions, etc. To complicate matters there is often interesting figure in close proximity to all these “defects”. I had a hard time in not being able to use this wood.
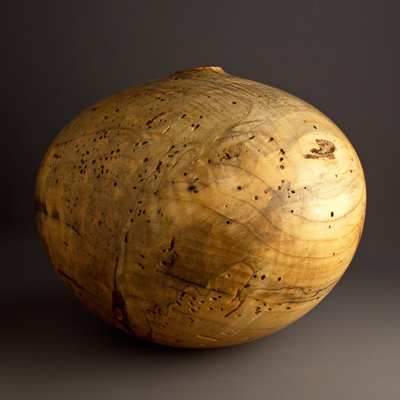
Therefor I use anything in my sculptural work. I can work around or incorporate these elements in my turnings. Occasionally they bring their own set of challenges, but by and large they turn just as well as other parts of a tree that is defect free. This is also why I am primarily turning vessels. Aside from them being more enjoyable there is less labor in cutting, hauling, grading, and discarding off wood for utility work.
Spindle Turning
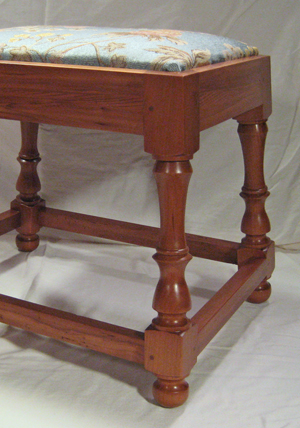 Spindle turning is fairly open, though the nature of spindle turning lends itself more towards function than decoration. Thus functional items generally look to use defect free wood. I look for intact quarter or rift sections free of insect damage and cracks. I leave all the defect wood for sculptural work.
How to store the wood blanks
At this point the tree has been felled and sections of it cut into wood turning blanks. Unless the wood is going to be spalted (more on that below) it needs to be stacked and dried. The aim is to regulate the rate of evaporation so the wood doesn’t dry out too quickly. Cracking goes hand in hand with evaporation, so the higher the rate of evaporation the more rapid cracking will be.
I primarily manage the rate of cracking by leaving the tree sections in as large a state as I can manage. This allows for an initial reduction in moisture before I cut the wood down into more manageable wood turning blanks. In ideal situations, a tree that has been felled is cut into trunk sections several bar lengths long. Those larger trunk sections sit for 3-6 months before coming back to section it further. Its also best to do the cutting in the winter months. The trees are dormant in the winter, thus they don’t retain as much moisture. The evaporation rates are really low, and insect activity is negligible as well. Its more difficult to manage evaporation/cracking in warmer months.
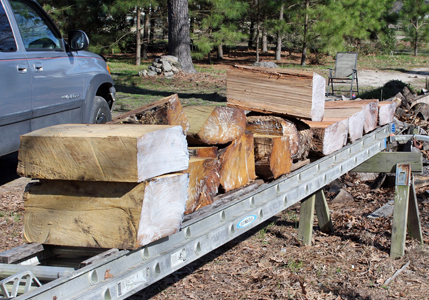 Coat all the end grain surfaces with a water-based wax sealer. I use Anchorseal2 that I have gotten from Woodcraft in the past. Amazon carries it now, so that is more convenient for me these days. Some people like to coat all the cut surfaces; I think that is probably a bit overkill. The majority of evaporation comes through the end grain. I am more inclined to coat all surfaces on sections of burl and crotches that have multiple cut surfaces. End grain is exposed on multiple sides of a crotch section. Burls are kind of like that too as the grain direction goes all over the place, and its best to seal it up.
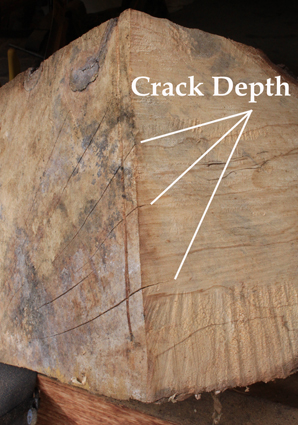 The wood blanks need to be stacked out of direct sunlight and covered so that it is not rained on. Surface cracking is more rapid in direct sunlight. Don’t be surprise however if you do see checking on the end grain. Often those cracks don’t extend far into the wood, the goal is to reduce or eliminate the catastrophic cracking. Additionally, rain will wash off some of the wax coating. The aim is to reduce the moisture content more slowly.
Some species are more prone to cracking than others. Walnut in particular is bad about cracking all the way across the blank. The same is true of insect exposure, as certain species of tree are more attractive to insects than others. It may be necessary, after the wood has been stacked, to spray an insecticide on the surface of the wood to discourage insect activity. The risk of this is mainly if the wood is in ground contact and is stored outdoors. I stack my wood turning blanks off the ground on treated 4x4s and stack the blanks in a way to promote some air flow. As long as the wood isn’t allowed to be rained on I wouldn’t worry about a fungicide application.
How to Spalt your Wood Turning Blanks
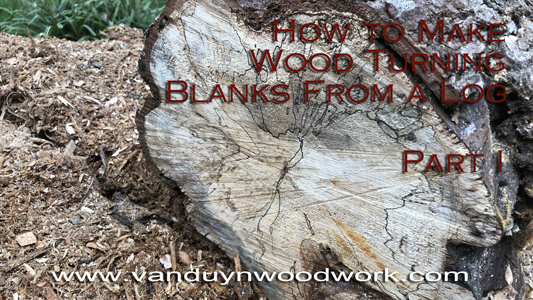 I turn a lot of spalted wood, mainly a byproduct of gathering more wood than I can turn in any short period of time. Sometimes I come across trees that have been down for a while and there is a decent amount of spalting present. My first video on cutting wood blanks looks into cutting spalted wood.
I have wood that I expose to the elements and the spalting sets in on its own. I don’t like to turn wood that is dripping wet so it’s a nice opportunity to let some of the moisture work itself out of the wood blanks and possibly develop some spalting. Spalting is moisture dependent so the more arid the climate the less fungal activity there is. In North Carolina there is no shortage of moisture, anything left outside is going to spalt its just a matter of how long it takes.
Anything that I think is plain wood I usually target it to spalt. I like to leave turning wood in as large of a tree section as I can. This affords more flexibility in cutting out sections that have decayed too much later on. Spalting is a natural decay process so the degree in which a tree breaks down is going to depend on the species of tree and how aggressive the fungus is. Leaving the wood outside to get rained on works fine in my area.

I like to stack wood as the wood in ground contact deteriorates more quickly. Its nice to turn wood where the fungus has grown far into the tree. Therefor I find that in most species the spalting that has developed more slowly has greater depth formation into the log. Some species of fungi are more aggressive than others too, so stacking helps longer fungi formation develop.
Heartwood and sapwood also spalt at different rates. Sapwood is attacked more quickly as the fungi are feeding on the sugars in the sapwood. Rapid decay tends to have one type of fungus that takes over, and that is usually white rot in my area. Zone lines are formed when multiple species of fungus come in contact with one another. Dramatic zone line formation is going to result from many fungi eating on the wood at the same time. Another reason for giving those fungi more time.
Spalting is hard to control so I advocate just letting the wood do its thing. I have had logs sit on a trailer out in the open for a year or so develop extensive zone line formation, while others in ground contact look rather dull. Covering the wood with leaves helps retain moisture and will likely speed up the decay rates. Also be advised that spalted wood attracts insect activity sometimes to the detriment of the wood. The whole process is very species driven both on the species of fungus and the species of tree and their interactions to each other. Interested in learning more about spalting check out my article on spalted wood and how to use it. Spalted Wood by Sara Robinson is also a really interesting read.
When are the wood turning blanks ready to use?
Green wood turning is fun, but I don’t like to turn wood that is dripping wet. Rough turned bowls are sealed after turning so that is an exception. Wet wood clogs up sandpaper, leaves water marks, and hollows differently than dry wood. Very green wood is more elastic and thus flexes more. This makes the hollowing of thin walls vessels more difficult and more prone to breaking while hollowing, particularly on end grain.
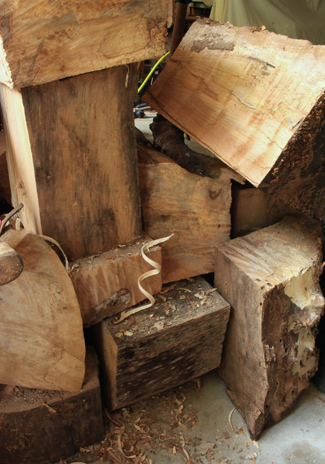 The same is true for wet spalted wood, not only are those spalted areas more elastic but the wood’s structural integrity has been weakened. Wet spalted wood tends to be the most prone for breaking while turning. Thus, I prefer for spalted blanks to be fairly dry. Some moisture is certainly tolerable, preference for those blanks with less spalted grain. Wetter wood also tends to move more during the drying phase after hollowing. I don’t mind some movement, but really wet wood can cause your hollow form to distort too much. Conversely wood that is extremely dry can also be more difficult to hollow as it sometimes is brittle and causes the hollowing tool to chatter more often. Ideally, I hit the sweet spot in the middle with some moisture content but not too dry.
Sufficiently spalted wood is removed from the elements and dried out. All spalted wood should be dried out very well before using. Otherwise the risk of it breaking increases. That being said, sometimes I find denser fine grained wood retains its structural integrity even when spalted heavily. In those cases its possible to get away with wetter wood. Spindle and dried rough bowl blanks also need to be very dry. To similar extent of air dried lumber. That ranges according to local climate, though in my area very dry is 6% moisture content. While I don’t put a moisture meter on those blanks I wager they are in the range of 6-12% moisture content.
Item and Tool links in this article
Harvesting Urban Timber – Sam Sherrill
Husqvarna 445
Husqvarna 455 Rancher
Dewalt One Touch Tool Box
Husqvarna 445 18″ Chain
Husqvarna 455 20″ Chain
Oregon Chainsaw Field Sharpening Kit
Husqvarna Bar Oil – Gallon
Husqvarna 2-Cylce Oil
Quick-Flow Spout Midwest Can
Eagle UI-50-FS 5 Gallon Gas Can
Husqvarna Ear Muffs
Eastwing 36″ Wrecking Bar
Felled Spiked Tree Felling Wedges
Eastwing Sure Split Wedge
Edwards Tools Classic Log Splitting Wedge
Stanley FatMax 4lb Hammer
Safco Products Tuff Truck
Husqvarna Scrench

