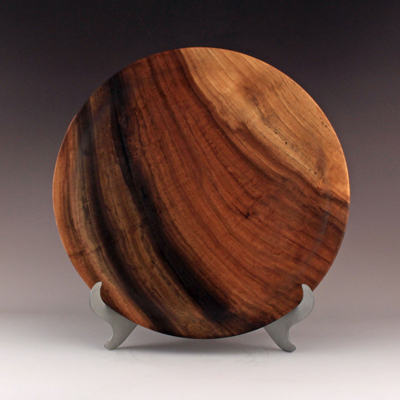
Dark Poplar Utility Platter
I am a wood turner and woodworker out of Raleigh, North Carolina professionally producing items for well over the last fifteen years. This article delves into the top food safe wood finishes on the market. I have used most of these finishes at some point in time. So, I will discuss background on each finish and what I believe to be the best performing food safe wood finishes. Additionally, I overview prep and the process of finishing utility items that I have developed.
A little background on Finish types
For the most part, excluding shellac, all of the food safe wood finishes discussed are penetrating finishes. That is they are a class of finish that penetrates into the wood. Conversely, shellac is a film finish in that it produces a layer on the item surface. Polyurethanes and Lacquers are other types of film finishes. Wax in this case is for the most part going to reside on the item surface as well. Waxes alone however make a poor finish.
Penetrating finishes basically all apply the same way. The item surface is flooded with the finish, allowed to soak and then the excess is removed. Multiple coats are applied in this manner until the desired level of protection is achieved. In terms of durability penetrating oils do not offer the level of protection that film finishes do. That being polyurethanes, lacquers, conversion varnishes, etc. Though most of the food safe wood finishes are penetrating oils. Additional reading on types of woodworking finishes.
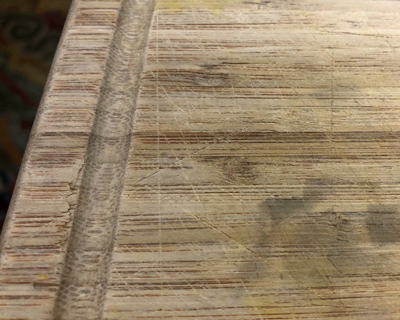
Cutting Board Scratches and Stains
Where oils lack in durability they more than make up for in ease of application, cost, and ease of repair/maintenance. Those are important considerations given the extensive use of food safe or serving items. Durability is the ability to resist dings, scratches, acid exposure, etc. on the woodware. The most durable wood finishes are those with the highest solids contents of their component resins. Those resins often come from petroleum chemicals. They require the use of solvents to keep the resins in liquid form for application. All of these compounds carry some level of toxicity, some being rather toxic.
Philosophy on “Food Safe” – Wood Finishes that are Food Safe
That brings us to the school of thought that says that any finish once fully cured is “food safe”. Nitrocellulose lacquers and their cooresponding solvents (lacquer thinner) under this thought qualify them as being food safe. That is once the lacquer has completely cured and there is no longer any off gassing.
Waterborne finishes carry the lowest level of toxicity of finishes that have petrochemical derivatives. They are composed of water, acrylic/polyurethane resins, and a catalyst to initiate curing. While not at the same level of toxicity as conversion varnish or lacquer, lets say, they still have components that are toxic.
All in all I think it prudent for food safe wood finishes to be completely organic and occurring from natural sources. It’s hard to characterize whether any of those toxic compounds from manufacturing processes will leach into the food. At best there is no issue and at worst we could be exposing ourselves to additional toxicity, albeit likely marginal amounts. Either way I think it’s not something that I would run the risk of. Especially as the wearing of these utility items causes problems for film finishes.
The function of the item dictates the finish
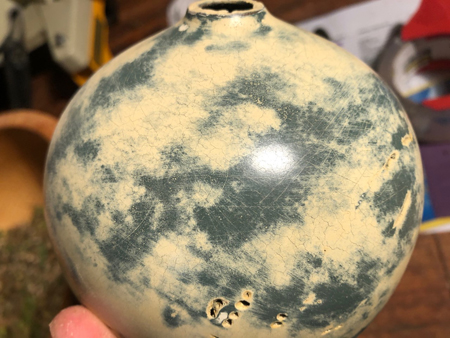
Sanding Scratches Visible on Painted Surface
Utility items (salad/serving bowls, cutting boards, utensils, etc.) by their nature are high wear items. They are far more likely to be scratched, dinged, cut than other furniture or household wood wares. So, those scratches will show up in a film finish quite noticeably. They will be even more pronounced the glossier the finish is. As an example this painted hollow form has sanding scratches quite visible. Paint is more akin to a film finish so the scratch effect is similar.
With that in mind the most important finish qualities (in my opinion) are low sheen, ease of repair/maintenance, and ease of application. So that has us squarely in the camp of using penetrating oils. That is unless you want to be constantly sanding down and repairing a film finishes. Also not a good look if you are selling woodwares. Now taking this into consideration I think it better to stick with a naturally occurring food safe wood finishes rather than a chemically produced penetrating oils.
Types of Food Safe Wood Finishes
Is Shellac Food Safe?
Let’s start with Shellac as it is the only film finish on the list. Shellac is a resin produced by the female lac bug. It (shellac) is deposited on trees in the regions of India and Thailand. Those resins are used to create protective tunnels on the branches of the trees for the insect. When those branches, resins included, are harvested they are referred as “sticklac”.
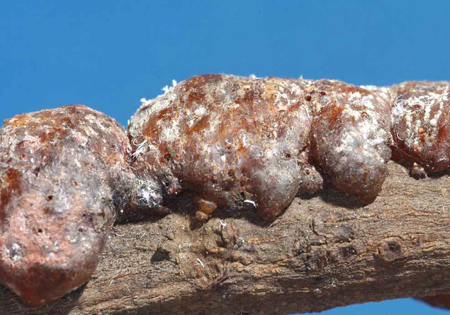
Sticklac – phillacolor.com
The sticklac is processed and purified eventually producing a solid flake. Shellac flakes come in various tones ranging from garnet to amber to superblonde. The least colored, i.e. the superblonde, is produced when the lac insects feed on the Kusum tree (Schleichera oleosa).
The flakes are soluble in denatured alcohol and a liquid finish is created by dissolving the flakes or powdered flakes creating a “pound cut”. The pound cut is a reference of concentration. For example, a 2lb cut is 2lbs of flakes dissolved in 1 gallon of alcohol. The proportion of shellac increases depending on the thickness of finish. More viscous finishes have greater proportion of shellac flakes. Liquid Shellac typically has about a 1 year shelf life which is why it’s usually best to mix fresh cuts per project. The dry flakes have an indefinite shelf life.
Naturally, the shellac from the lac bugs contain a small amount of wax (3-5% of volume). Most flakes sold are sold as dewaxed flakes. This is done so other top coat finishes will not have any problems adhering to the shellac. Shellac is commonly used as a seal coat in many finishing processes.
Use of shellac in finishing
I typically use shellac as a seal coat on furniture pieces. This is especially the case when using colorants (stains, dyes, etc.) and spraying a finish. In the realm of food safe items I tend to not use colorants as a lot of the wood I use has lots of natural variation. Therefor I usually stick with penetrating oils. Colorants would mask all that variation. All that said I was finishing with shellac on some of my earliest pieces.
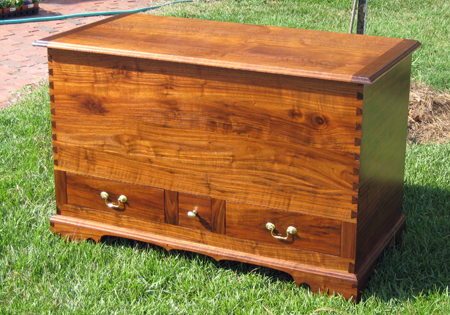
Bridal Chest Finished in Buttonlac
Shellac dries quickly to a high gloss sheen and has more solids than a Danish oil does. It is generally preferred to finish with a pound or two pound cut as heavier ratios have the problem of not adhering well to the substrate. Multiple thinner coats produce better results than fewer thicker coats. Shellac “melts in” as lacquer does, that is each additional coat dissolves into one contiguous layer.
A pad, i.e. wad of cotton cloths, is the traditional medium for applying shellac to the wood surface. Although brushing shellac is fairly common as is spraying. To pad shellac apply a small amount of shellac into the pad. The pad applies the shellac to the wood usually in a circular motion as opposed to back and forth (brushing). I would consider brushing shellac over padding if the surface was flat. Think cutting boards vs bowls.
So is shellac food safe? Yes after alcohol evaporation, meaning the finish fully cures. I like shellac a lot for certain purposes, and I find it characteristics better for furniture than food safe items. Its main draw backs are the lengthy application times and ease of showing scratches. Shellac also has the distinct drawback of showing water marks. Condensation rings from drinking glasses creates water marks in a shellac finish. It is easy to repair however given its ability for each layer to melt in.
Mineral Oil Food Saftey
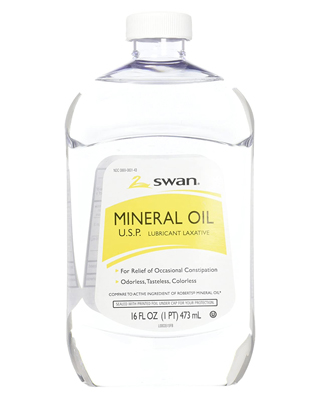
Mineral Oil is a petroleum derivative so it isn’t considered a natural oil, though it is food safe. Its most commonly sold in pharmacies as its used as a laxative. Sometimes it is found in hardware/woodwork/big box stores under the butcher block oil labelling. White oil, paraffin oil, liquid petroleum, and baby oil are all mineral oil under differing names. The latter typically has fragrance added to it.
Its main advantages are that it is colorless, odorless, tasteless, inexpensive, and won’t go rancid. It is a penetrating oil so it’s application is the wipe on wipe off method. The biggest plus is its colorless. Most penetrating oils tend to impart a yellowish caste of some degree to the wood. Mineral oil will give you a more-true to natural wood color. That is advantageous when the wood has lots of tonal variation or there are multiple species used.
That however is about as far as it goes. Mineral oil is not a food safe waterproof wood finish. Nor is it durable, offering little to no protection against scratches, and evaporates very quickly. While most penetrating oils don’t offer much in the way of durability, mineral oil is close to the bottom of the pack. That aside the poor water protection and the evaporation are the biggest problems. Bowls I have used mineral oil on needed recoating every month or so. I had also used mineral oil on some of my earliest sculptural hollow forms before top coating with lacquer. On those pieces I had many microbubbles develop in the finish after the lacquer curing. All in all, find mineral oil a poor choice.
Is Linseed Oil Food Safe?
There are three main categories of Linseed Oils. That is Raw Linseed Oil, Polymerized Linseed Oil and Boiled Linseed Oil. Linseed oil comes from flax seed pressings. In its raw state it produces an oil that has a long history as a wood preservation product. Its main draw back is that Raw Linseed oil dries/cures extremely slowly. On the order of two to ten weeks depending on environmental conditions. Therefor, while a natural and one of the food safe wood finishes it isn’t very practical.
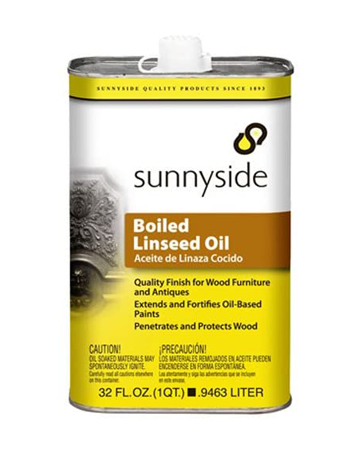
You may have heard of Boiled Linseed oil (BLO), and is probably the most common to see in hardware/big box stores. It’s a bit of a misnomer as BLO is Raw Linseed oil that hasn’t actually been boiled. Or the boiling at least today isn’t what causes it to cure so quickly. It has had other additives (drying agents) that increase the curing time that plagues raw linseed oil. Those additives no longer make it natural nor food safe. Typically, those drying agents are things like Japan drier, Naptha, and/or heavy metal salts, all of which are toxic. So BLO is off the list.
Polymerized Linseed Oil is a reasonably viable choice as a food safe wood finish. This product is boiled in the absence of oxygen – that’s the polymerization part. The polymerization process helps the oxidation/dry/cure rate of the oil so “drying” time of polymerized oil is vastly shorter than that of raw linseed oil. This is a heat processing method, rather than incorporating additives so the oil maintains its natural food safe quality.
Looking at the heat processing chemically, altering the fatty acid chains in linseed oil allows double bond formation more quickly. This increases the rate of polymer chain crosslinking and thus speeds up the curing rates. Here is a really good article on the chemistry of linseed oil polymerization. It is worth the read if you want a more in depth understanding of the process.
Use of Polymerized Linseed oil for finishing wood wares
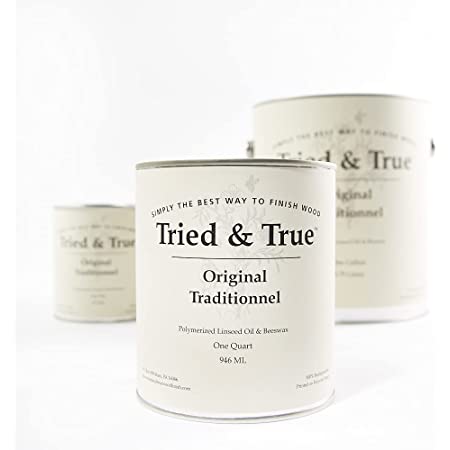
The most notable brand of polymerized linseed oil is Tried and True. My experience is limited to BLO, though polymerized linseed oils basically finish the same way. Its a wipe on saturate and wipe off application.
Tried and True recommends to let the oil sit on the wood surface for an hour before wiping off and buffing. Recoat time is 24 hours. As far as oils go that is a fairly long saturation period relative to commercial oil blends (i.e. Danish Oil, Tung Oil finish, etc.). The manufacturer recommends two or three coats, possible additional coats for high wear surfaces. Additional coats won’t add to the sheen though it does improve the durability.
From what I have been able to find Tried and True has varying opinions. There are folks who have had good experiences with it and others that have had issues. Some of those issues being the finish is too thick from the onset and requires heating to reduce the viscosity prior to application. Issues of weeping and longer than normal curing times have also come up. While never having used it myself I suspect the issue has more to do with batch processing inconsistency from the manufacturer. All in all I think it a reasonably good choice of one of the food safe wood finishes on this list.
Food Grade Oils for Woodwork
Meaning cooking oils as class of food safe wood finishes. I do know some older professional bowl turners that used olive oil for a long time. Though, most have moved away from cooking oils as there are better options at this point. With so many different kinds of cooking oils now would they be an option?
The main argument against cooking oils is that they go rancid from oxygen exposure. Secondarily cooking oils are similar to raw linseed oil in that they wet the surface but the degree to which they cure is minimal. Depending on the kind of cooking oil you may find there may be some degree of film formation, but the cure time I suspect is very long.
I have suggested, to customers, that they rub down their bowls as a maintenance step with olive oil. It is the easiest and most available option. This is mainly to help the bowl hold its luster. It’s not the primary finish as I find there are better options. Additionally, frequent use of these woodwares means frequent washings. That washing helps minimize the degree of oil rancidification in my opinion.
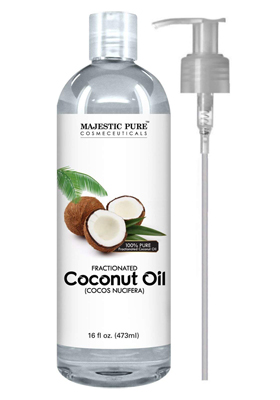
Fractionated Coconut oil has recently come on the market and is fairly easy to acquire. Its coconut oil that undergoes processing to remove long chain fatty acids. Those long chain polymers are the ones that oxidize the quickest. Thus, fractionated coconut oil does not go rancid. There are some products or recipes for fractionated coconut oil and beeswax blends. These are most typically seen marketed for cutting boards. I haven’t used either of them yet myself, though it may hold promise as a maintenance product. Overall the consensus is negative for cooking oils as food safe wood finishes.
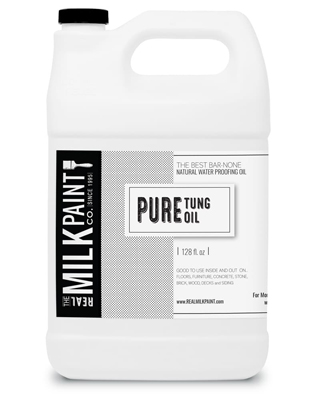
Pure Tung Oil – Is Tung Oil Food Safe?
Tung oil, sometimes known as China oil, Chinawood oil, etc., is a natural drying oil derived from the nuts of the Tung Tree. The Tung tree is native to China and other parts of Asia. It has a long history of use mainly for its water-resistant qualities. Its doesn’t dry as hard as linseed oil, thus it tends to be a bit more durable. Often times durability and hardness come at the expense of one or the other.
Like Linseed oil finishes, there are several under the Tung oil moniker. Generally, for the same reasons too. Tung oil naturally is a slow curing oil, though not on the same order as raw linseed oil. A full cure for pure tung oil is about 15-30 days. Aside from pure tung oil, there are tung oil blends and polymerized tung oil. Tung oil blends, labelling often as “Tung Oil Finish” has various resins, dryers, and other additives to increase the cure rate. Polymerized Tung oil, like Polymerized Linseed Oil has been boiled to increased the cure rate through altering the polymer chain bonding. Some of these Tung oils on the market are not types of food safe wood finishes. So, read the label and check the components of the finish to know what your getting.
Tung Oil Application
The strategy in finishing with Pure Tung Oil is to load up the wood grain till it won’t hold any more finish. The process for doing this varies depending on the density and age of the wood. Right out of the bottle, most manufacturers recommend thinning the pure tung oil with a solvent 1:1 as a general baseline. The oil is thick so it takes too long to cure without thinning. Thin it more for woods that don’t absorb the finish as quickly.
Conversely, woods that absorb more quickly can use less solvent, i.e. the finish is thicker. The wood reaches a level where it won’t absorb any more finish. On the first wave of application add subsequent coats. Reapply every half hour or so until the wood stops drinking up the oil. This could take as many as a half dozen coats. Once the wood has its fill, wipe off the excess. Pure tung oil eventually dries to a matte sheen.
Coat the items a second time, in the same manner as the first wave of oiling. Once again use the same 1:1 ratio oil to solvent for the second oiling. It may still take multiple coats to achieve the uniform wet finished look. As in the case of shellac, multiple thinner coats are better than fewer thick coats. Removing the excess pure tung oil after the last soaking. The oil that has soaked into the pores of the wood will gradually oxidize forming the finish barrier. Drying continues over the next one to two weeks. Full cure is somewhere around 2-4 weeks.
Walnut Oil for Finishing Woodwork
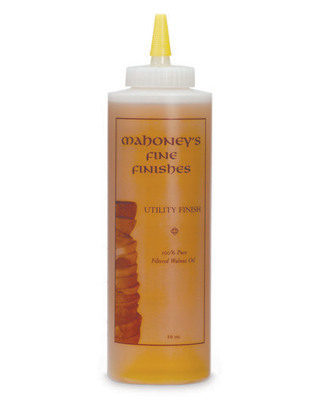
Walnut Oil is a new comer to the market, I believe for about the last 15 years or so. I first became aware of it sometime around 2007 when I used it to finish a butcher block top. To my knowledge it was brought to market by Mike Mahoney, whom is a professional bowl maker. I may be incorrect about that though. Either way his brand, Doctor’s Woodshop, and Andrew Pierce are basically the three available brands. Andrew Pierce is the most recent of the three and probably sources from the same primary supplier. It along with Doctor’s Woodshop are easily accessible as it is sold on amazon.
Walnut finish differs from walnut cooking oil due to the heat treatment. The heat treatment denatures the proteins some people have allergies to. I also suspect that it aids in the polymerization of the oil. That being the oil oxidizes more quickly than cooking oils. The type of oil used for finish has a high Ph and higher concentration of linoleic acid. Walnut oil naturally contains both linoleic and linolenic acid, an omega 6 and omega 3 fatty acid respectively. Per the article cited previously, oils with higher concentrations of linoleic acid relative to linolenic acid tend to have better drying oil characteristics.
Similar to polymerized linseed oil and tung oil, walnut oil finish is a drying oil. Walnut oil soaks into the wood grain, reacts with the wood surface, and forms a hard barrier. I suspect the high concentration of linoleic acid helps the oil soak into the wood and not form a surface barrier as quickly as with polymerized linseed oils. Presumably this gives it better depth of finish. Tung oil has longer cure rates so I don’t think it suffers from that problem as much. Either way the application is similar to that of linseed and tung oils. Saturate the wood surface and wipe off.
Due to the oxidizing and the fatty acid makeup, walnut does not rancid as cooking oils do. The other main advantage is that walnut oil tends to not discolor the wood to the degree that linseed and tung oil do. Both linseed oils and tung oil have a stronger yellow cast when applied and the yellowing tends to be greater when aging compared to walnut oil. The concentrations of linolenic fatty acid appear to contribute to the yellowing. I.e. the greater the concentration the more yellowing. Lastly walnut oil is not as viscous as polymerized linseed or tung oils, so no heating or diluting required.
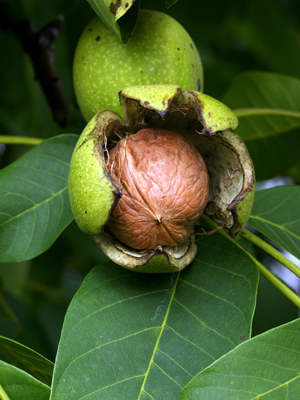
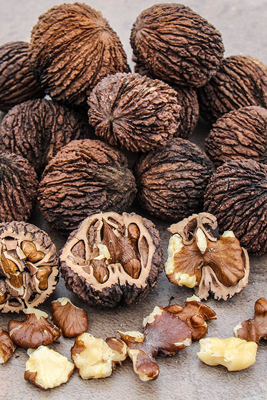
Mike Mahoney sources his oil from northern California, as I am sure the others do as well. Doctor’s is from Oregon and the language from Andrew Pierce is almost identical to Mahoney’s. Andrew Pierce is also an east coast brand (Vermont). So, I suspect they source walnut oil from that region, perhaps even the same supplier. Commercial walnut trees grown in northern California are almost all English Walnuts (Juglans regia). Originally being a Persian walnut, though there are several varieties at this point. It is possible that oil produced from Black Walnut (Juglans nigra) may perform even better as a drying oil as it has higher concentrations of both linoleic and linolenic fatty acids. Black walnuts, native to the U.S., are more difficult to process. They aren’t grown commercially at the level of English walnuts.
Despite it being a newer introduction as a woodwork finish, walnut oil actually has quite a long history as well. There have been records of its use going back to at least the renaissance period and potentially longer than that. Many of the old masters (Vermeer, Da Vinci, Van Eck, etc.) had a preference for walnut oil over linseed oil in mixing their paint. For them it was mainly the yellowing issue with linseed oil. This was a period where painters commonly developed their own paints and formulas for those paints. In some ways there is some similar chemistry parallels between the drying of oil-based paints and drying oils for wood finishing. Here is a nice article on walnut oil and its history in paint making.
Beeswax and Carnuba Wax are Technically Food Safe Wood Finishes
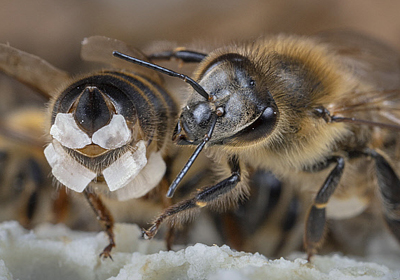
By themselves they make poor finishes. However, waxes frequently finalize the finishing process. Often as a polishing or rubbing out step. Honeybees make bees wax from wax glands that produces small scales of wax. The glands are very active typically in the spring or shortly after a swarm. Beeswax is the building material for their comb and cell cappings. Honeybees cap their comb either for rearing brood or capping stored nectar. The lightest color of beeswax (almost white) is generally the freshest. Most often it goes on comb for storing honey. The rearing of bees (brood comb) tends to darken the wax producing a deeper yellow color. Older comb tends to yellow more as well.
Carnuba wax (palm or brazil wax) is a product from the waxy leaves of the Carnuba palm, which grows in Brazil. It is a hard brittle wax that comes in multiple grades of purity. It has widespread uses across many different industries. Often times Carnuba wax becomes pliable with the addition of other soft waxes (i.e. beeswax) for easier use. In woodwork waxes enhance the shine of the wood. They also help protect the finish surface from moisture and some degree of UV light exposure. Harder waxes tend to be more durable but harder to apply.
Apply waxes in the karate kid manner, wax on… wax off. The amount of rubbing in or off will depend on the amount used and the pliability of the wax. Formulas range from liquid wax to hard brittle wax. Although liquid waxes don’t fall into the food safe category, think automotive waxes. I personally prefer products that are about the consistency of softened butter. Those products are a blend of waxes generally with a significant portion of oil. With this product type too much left on the surface of your product can cause a firm sticky/gummy film.
Both beeswax and carnuba wax are natural products. Though they are often formulated with additional ingredients and relabeled. Many times it’s a blend of beeswax, carnuba wax, and some oil such as orange or mineral oil. Occasionally these formulas contain toxic components so it’s helpful to find the ingredients of each product.
How to finish your utility items
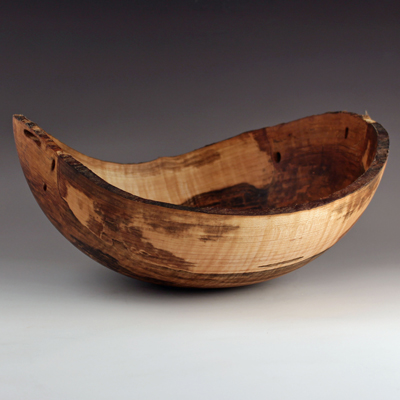
Natural edge Maple bowl finished in Walnut Oil
I use walnut oil (Mahoney’s) as my finish of choice for items that require a food safe finish. I believe it to be in the top of its class, although Tung Oil and Polymerized Linseed Oils I think would give good results as well. For a final top coat I apply a blended wax for extra protection. More on that below.
While I mainly produce bowls, this method is suitable for any item that will receive a food safe finish. All items are sanded to 220 before the application of oil. I prep bowls on the lathe sanding in both directions. Do as much sanding on the bottom of the bowl as can be. The small tenon left on the bottom prevents complete sanding. I carve the tenon off, hand scrape the tool marks and hand sand the bottom center of the bowl once the bowl is off the lathe. A vacuum chuck eliminates this step, though I personally find it a luxury. Finally I burn my signature in the bottom and hand sand to improve clarity of the signature, all up to 220 grit.
This is my method for applying food safe finishes. I apply two coats of oil (walnut) not being in a rush to wipe off immediately as I give it the opportunity to soak in. Applying one coat per day and after the second coat I prewash these items to raise the grain and break down some of the finish. I prefer to immerse any object in a tub or bucket of walnut oil and let drip dry and wipe excess off later. However in practice I only do this for small objects as I am no longer producing enough bowls or large pieces to justify the space and expense of a dedicated dunking tub, but the results are definitely better.
I hand wash these pieces with mild soap and warm water as I do when cleaning my dishes. Make sure to towel dry them and let completely dry overnight. After the drying the bowls will feel very fuzzy. The prewash is to avoid the grain raising at a later time. Especially once these items have are in the hands of customers. If your not familiar with raised grain, its when the wood fibers are lifted after wood has been wetted. The surface will feel fuzzy especially on coarse grain woods such as oak and ash.
Some people like to incorporate this step in their surface preparation, and it is a must if you are using water based colorants or finishes. I would also argue that it is critical for any utility item. Washing is frequent so there is lots of water exposure. Spraying bowls with water while lathe sanding is a common step. However, I find that prewashing yields better results. Spraying did not sufficiently raise the grain enough (for me) to eliminate this problem later with future washings.
Following the prewashing make sure the item has dried completely. The raised grain is knocked down (i.e. sanded) with 400 grit sandpaper. I am currently using Norton 400 grit. Cut a quarter sheet into thirds, and then fold that strip into thirds for hand sanding. Expect oil residue buildup on the sandpaper. The significance of the build-up is minimal and there should not be a lot of sandpaper usage because of this issue. This step dramatically enhances the tactile quality of your work.
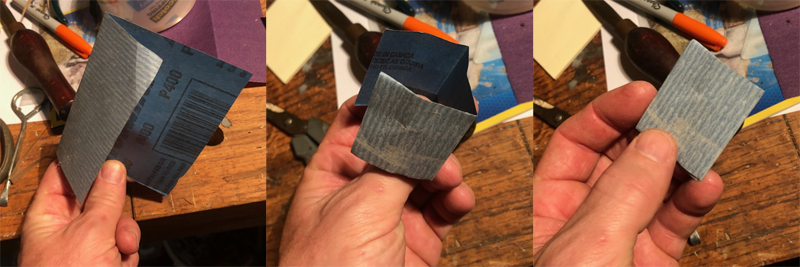
Folding Quarter Sheet Sandpaper for Hand Sanding
Following the knocking down of grain, I apply a third coat of walnut oil. Immersion is always good if you can. The amount of oil absorbed will have slowed at this point, so give it some time to soak in and wipe off the excess. The remaining step is to apply a wax, blended of walnut oil, carnuba, and beeswax to help improve the luster and to further seal the wood. This utility paste wax has a consistency similar to softened butter due to the high amounts of walnut oil.
I apply two coats, no more than one per day. Mike Mahoney sells this Walnut oil wax, though I personally blend my own wax. There are a few other similar products on the market in addition to Mahoney’s. If blending yourself note that the higher amount of carnuba wax will make the wax stiffer and thus a greater need to incorporate more walnut oil to develop a paste consistency. I prefer my waxes to flow very easily so I am looking for this consistency to be creamy.
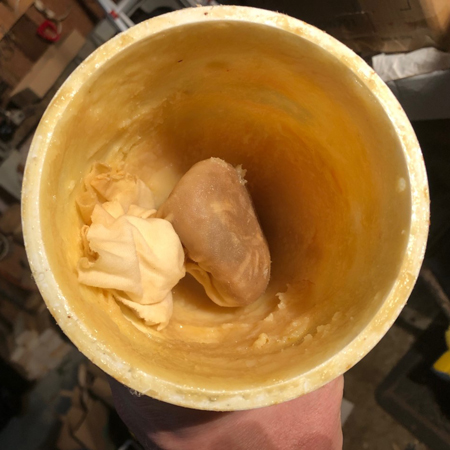
Homemade Utility Wax Blend
My batches last along time so I am still developing the best mixing ratios, so do not feel hesitant to tweak the formula. I believe my last ratios were 1:2 carnuba to beeswax melted in a double boiler, melt together and add sufficient oil to achieve the desired consistency. I believe I used a 3:1 ratio of oil to wax the last time I was blending the wax. Adding oil to the melted wax speeds up the cooling. This creates chunks of wax that require additional blending. Next time I am mixing wax I believe I would warm the oil first then dissolve the wax in the hot oil. After reflecting on it I am not entirely sure at this point why I didn’t do that last time.
Recently looking at my wax there does appear to be some shelf life to the wax. At a certain point the wax becomes a little gummy. I suppose this is due to the walnut oil curing out. At this point I would experiment with reliquifying the wax blend to see if that remedies the problem. Otherwise I would just remake a new batch
Once completely cooled the wax stiffens. Often requiring additional tweaking to achieve the creamy consistency created with a warm wax mixture. After completely cooled add more oil to reestablish the creamy consistency. Expect some larger chunks of wax which need breaking for a uniform paste. The second mixing will be fairly stable and there should not be much if any need to tweak the consistency further.
How to get the most life out of your food safe wood finishes
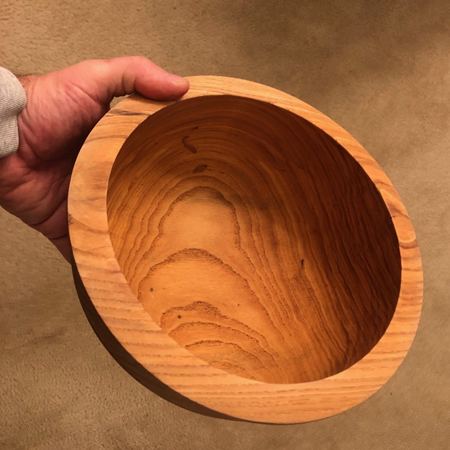
Well Used Ash Bowl with no Reconditioning
In recent years I have shifted my diet so that I consuming a lot of leafy greens. Meaning I eat a significant number of salads and thus get to use and wash my bowls on a daily basis. Using the finishing method above I have never or very infrequently had to recondition the bowl. The luster isn’t as strong compared to a new finishing but I think its holding up rather well. I haven’t felt it was so dull looking that it needed additional conditioning. Additionally, the grain has not raised at all either.
So for overall care of the wood wares it requires hand washing and towel drying. I don’t leave my wood items wet. Don’t microwave a wood bowl as that may induce surface or fatal cracking. Also don’t put the bowl in the dishwasher. Its fine to apply a lite coat of walnut oil or paste wax after washing. The vast majority of the time this isn’t necessary. Excessive wax build up should not be a concern with multiple washings.
Other Articles on Finishing Woodwork
What Types of Wood Finishes for Woodturning and Woodwork
Danish Oil Finish – Top 3 Reasons to Mix your Own
Items links related to this article
Garnet Shellac Flake
Amber Shellac Flake
Superblonde Shellac Flake
Denatured Alcohol
Mineral Oil
Tried and True – Polymerized Linseed Oil
Fractionated Coconut Oil
Pure Tung Oil
Mahoney’s Walnut Oil Finish
Doctor’s Walnut Oil Finish
Andrew Pearce Walnut Oil Finish
Beeswax Pellets
Carnuba Wax Pellets
Norton 400 Grit
Mahoney’s Walnut Oil Wax Paste


